Ryeford Double Lock: Difference between revisions
Jump to navigation
Jump to search
No edit summary |
No edit summary |
||
| Line 1: | Line 1: | ||
'''To the Severn''': [[Ryeford Pipe Bridge]] | '''To the Severn''': [[Ryeford Pipe Bridge]] | ||
<br>'''To the Thames''': [[Oil Mills Bridge]] | <br>'''To the Thames''': [[Oil Mills Bridge]] | ||
== Gallery == | |||
6.6.14 | |||
<gallery> | |||
Image:RyefordDoubleLock1.jpg|As viewed from the west. | |||
Image:RyefordDoubleLock2.jpg|The bottom lock. | |||
Image:RyefordDoubleLock3.jpg|The two locks. | |||
Image:RyefordDoubleLock4.jpg|The view towards the top lock. | |||
Image:RyefordDoubleLock5.jpg|The view west from the bottom lock. | |||
Image:RyefordDoubleLock6.jpg|The view west from the top lock. | |||
</gallery> | |||
[[Category:Stroudwater Navigation]] | [[Category:Stroudwater Navigation]] | ||
Latest revision as of 23:58, 30 December 2014
To the Severn: Ryeford Pipe Bridge
To the Thames: Oil Mills Bridge
Gallery
6.6.14
-
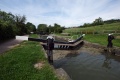
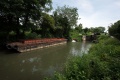 As viewed from the west.
 -
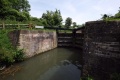 The bottom lock.
 -
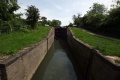
 The two locks.
 -
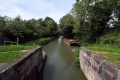
 The view towards the top lock.
 -
 The view west from the bottom lock.
 -
 The view west from the top lock.


