Bridgwater: Difference between revisions
Jump to navigation
Jump to search
No edit summary |
No edit summary |
||
| (10 intermediate revisions by the same user not shown) | |||
| Line 1: | Line 1: | ||
==Track Plans == | '''To Weston Super Mare''': [[Bridgwater Signal Box]]<br> | ||
'''To the Southwest''': [[Weston Zoyland Road]] | |||
== History == | |||
Opened on 14th June [[1841]]. The station was extended, and footbridge added in [[1882]]. Closed to goods in November [[1965]]. The branch to [[Bridgwater Docks]] closed on 2nd January [[1965]]. | |||
== Track Plans == | |||
<gallery> | <gallery> | ||
Image:Bridgwater Map 1946.jpg|An OS map of Bridgwater and surrounding area from [[1946]] | Image:Bridgwater Map 1946.jpg|An OS map of Bridgwater and surrounding area from [[1946]] | ||
Image:Bridgwater Track Plan 1988.jpg|A track plan of Bridgwater from [[1988]] | Image:Bridgwater Track Plan 1988.jpg|A track plan of Bridgwater from [[1988]] | ||
</gallery> | </gallery> | ||
== 1990s == | |||
<gallery> | |||
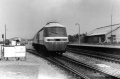
Image:47226-2.jpg|[[47226]] shunts the sidings at Bridgwater on the 25th April [[1990]]. | |||
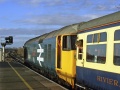
Image:47835-1.jpg|[[47835]] blasts through with a royal train on the 1st May [[1990]]. This loco was one of the dedicated Royal Train 47/8's at the time. | |||
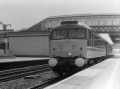
Image:Bridgwater3.jpg|An HST powers northwards. The yard in the left-background is currently used by DRS for loading nuclear flasks onto wagons. This was also where the branch to [[Bridgwater Docks]] left the mainline. | |||
</gallery> | |||
== 2005 == | |||
<gallery> | |||
Image:Bridgwater4.jpg|A view of the station with an HST heading for Bristol. ''© [[:Category:David Tutton|David Tutton]]'' | |||
Image:158853-1.jpg|[[158853]] heads through with a Bristol bound train. ''© [[:Category:David Tutton|David Tutton]]'' | |||
Image:Bridgwater6.jpg|A Voyager passing through. ''© [[:Category:David Tutton|David Tutton]]'' | |||
Image:Bridgwater7.jpg|[[50049]] about to leave with a Pathfinders tour. ''© [[:Category:David Tutton|David Tutton]]'' | |||
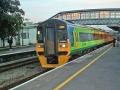
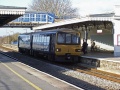
Image:Bridgwater8.jpg|A general view of the station with [[143603]] waiting with a service for [[Taunton]]. ''© [[:Category:David Tutton|David Tutton]]'' | |||
Image:Bridgwater9.jpg|The south end of Bridgwater Station showing a Voyager passing under two bridges. The first is a footbridge that links two housing estates. ''© [[:Category:David Tutton|David Tutton]]'' | |||
</gallery> | |||
== 2009 == | |||
20.4.09 | |||
<gallery> | |||
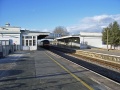
Image:Bridgwater10.jpg|The main station building. | |||
Image:Bridgwater11.jpg|A model railway shop on platform 2. | |||
Image:Bridgwater12.jpg|The view north showing signal B3 and the crossover for Bridgwater Yard. | |||
Image:Bridgwater13.jpg|The crossover has a 15mph speed limit. | |||
Image:Bridgwater14.jpg|The crossover. | |||
Image:Bridgwater15.jpg|Bridgwater Yard viewed from the station footbridge. | |||
Image:Bridgwater16.jpg|The crane is used to load nuclear flasks from Hinkley Point Power Station onto wagons for shipment to Sellafield. | |||
Image:Bridgwater19.jpg|[[37515]] and [[37688]] with a nuclear flask train on 27.11.07. ''© Geoff Sheppard, CC licence'' | |||
Image:Bridgwater17.jpg|Relay rooms and various other bits and pieces. | |||
Image:Bridgwater18.jpg| | |||
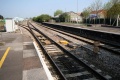
Image:Bridgwater21.jpg|The view south from the end of platform 2. | |||
Image:Bridgwater22.jpg|A bay platform at the north end of platform 2. The track provides a headshunt for Bridgwater Yard. | |||
Image:Bridgwater20.jpg|An old shed stands alongside a filled in bay platform at the north end of platform 1. | |||
Image:Bridgwater23.jpg|The filled in bay platform. | |||
Image:Bridgwater24.jpg|A Voyager hurtles through at close on 100mph. | |||
Image:Bridgwater25.jpg|The main station building viewed from platform 1 showing the footbridge. | |||
Image:Bridgwater26.jpg|A better look at the station building. | |||
Image:Bridgwater27.jpg|The view north from the station footbridge. | |||
Image:Bridgwater28.jpg|The view south from the same spot. | |||
Image:Bridgwater29.jpg|The view north from the south end of platform 2. | |||
Image:Bridgwater30.jpg|The view south with the pedestrian footbridge in shot. | |||
Image:Bridgwater31.jpg|The other side of the footbridge. | |||
Image:Bridgwater32.jpg|The view south from the station showing the bridge taking [[Weston Zoyland Road]] across the railway. | |||
Image:Bridgwater33.jpg|A zoomed view south. The track is the remains of Bridgwater Up Sidings. | |||
Image:Bridgwater34.jpg|An unused bay at the south end of platform 2. | |||
Image:Bridgwater35.jpg| | |||
Image:Bridgwater36.jpg|The view north from the south of platform 2. | |||
Image:Bridgwater37.jpg|A detailed look at part of the main station building. | |||
Image:Bridgwater38.jpg|The station buildings on platform 1. | |||
Image:Bridgwater39.jpg|The view north from the south end of platform 1. | |||
Image:Bridgwater40.jpg|The rear of the the buildings on platform 1. | |||
Image:Bridgwater41.jpg|The view north from the pedestrian footbridge that crosses the station. | |||
Image:Bridgwater42.jpg|The view south from the same spot. | |||
</gallery> | |||
[[Category:B&ER]] | |||
[[Category:Stations]] | |||
[[Category:David Tutton]] | |||
Latest revision as of 15:19, 14 July 2022
To Weston Super Mare: Bridgwater Signal Box
To the Southwest: Weston Zoyland Road
History
Opened on 14th June 1841. The station was extended, and footbridge added in 1882. Closed to goods in November 1965. The branch to Bridgwater Docks closed on 2nd January 1965.
Track Plans


1990s
-

-
-
 An HST powers northwards. The yard in the left-background is currently used by DRS for loading nuclear flasks onto wagons. This was also where the branch to Bridgwater Docks left the mainline.


2005
-
 A view of the station with an HST heading for Bristol. © David Tutton
 -
 158853 heads through with a Bristol bound train. © David Tutton
 -
 A Voyager passing through. © David Tutton
 -
 50049 about to leave with a Pathfinders tour. © David Tutton
 -
-
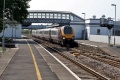
 The south end of Bridgwater Station showing a Voyager passing under two bridges. The first is a footbridge that links two housing estates. © David Tutton


2009
20.4.09
-
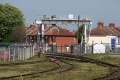
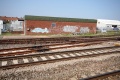
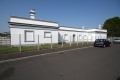
 The main station building.
 -
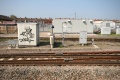
 A model railway shop on platform 2.
 -
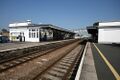
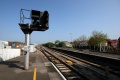 The view north showing signal B3 and the crossover for Bridgwater Yard.
 -
 The crossover has a 15mph speed limit.
 -
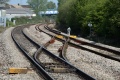 The crossover.
 -
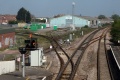 Bridgwater Yard viewed from the station footbridge.
 -
 The crane is used to load nuclear flasks from Hinkley Point Power Station onto wagons for shipment to Sellafield.
 -
-
 Relay rooms and various other bits and pieces.
 -
-
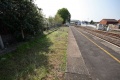
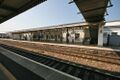
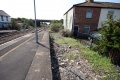
 The view south from the end of platform 2.
 -
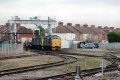
 A bay platform at the north end of platform 2. The track provides a headshunt for Bridgwater Yard.
 -
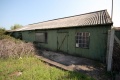 An old shed stands alongside a filled in bay platform at the north end of platform 1.
 -
 The filled in bay platform.
 -
 A Voyager hurtles through at close on 100mph.
 -
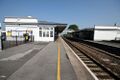
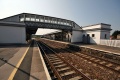 The main station building viewed from platform 1 showing the footbridge.
 -
 A better look at the station building.
 -
 The view north from the station footbridge.
 -
 The view south from the same spot.
 -
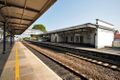
 The view north from the south end of platform 2.
 -
 The view south with the pedestrian footbridge in shot.
 -
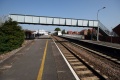 The other side of the footbridge.
 -
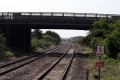 The view south from the station showing the bridge taking Weston Zoyland Road across the railway.
 -
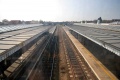
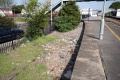
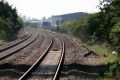 A zoomed view south. The track is the remains of Bridgwater Up Sidings.
 -
 An unused bay at the south end of platform 2.
 -
-
 The view north from the south of platform 2.
 -
 A detailed look at part of the main station building.
 -
 The station buildings on platform 1.
 -
 The view north from the south end of platform 1.
 -
 The rear of the the buildings on platform 1.
 -
 The view north from the pedestrian footbridge that crosses the station.
 -
 The view south from the same spot.


