Midford Viaduct (S&DJR): Difference between revisions
Jump to navigation
Jump to search
BristleGWR (talk | contribs) No edit summary |
BristleGWR (talk | contribs) No edit summary |
||
| Line 27: | Line 27: | ||
Image:Midford Viaduct7.jpg|Looking down on Cam Brook from the eastern side of the viaduct. ''© [[:Category:Ian Tiley|Ian Tiley]]'' | Image:Midford Viaduct7.jpg|Looking down on Cam Brook from the eastern side of the viaduct. ''© [[:Category:Ian Tiley|Ian Tiley]]'' | ||
Image:Midford Viaduct8.jpg|Looking down from the western side part of the [[Cam Brook Bridge]] which carried the [[:Category:Camerton Branch|Camerton Branch]] underneath this viaduct can be seen. ''© [[:Category:Ian Tiley|Ian Tiley]]'' | Image:Midford Viaduct8.jpg|Looking down from the western side part of the [[Cam Brook Bridge]] which carried the [[:Category:Camerton Branch|Camerton Branch]] underneath this viaduct can be seen. ''© [[:Category:Ian Tiley|Ian Tiley]]'' | ||
Image:Midford Viaduct9.jpg|Looking | Image:Midford Viaduct9.jpg|Looking west from the viaduct. ''© [[:Category:Ian Tiley|Ian Tiley]]'' | ||
</gallery> | </gallery> | ||
[[Category:S&DJR]] | [[Category:S&DJR]] | ||
Revision as of 19:36, 14 June 2008
<googlemap lat="51.343568" lon="-2.34468"> 51.343454, -2.344701, Midford Viaduct (S&DJR) </googlemap>
S&DJR
To Bath: Midford
To Radstock: Lower Twinhoe Farm Lane
GWR
To Monkton Combe: Midford Brook & Midford Road Bridge
To Hallatrow: Cam Brook & Twinhoe Road Bridge
History
Gallery
-
 A train crosses the viaduct on its way to Bath Green Park. The disused Camerton Branch can be seen passing under the viaduct and the road to Twinhoe passes under that.
 -
 A train heads south. © John Rawlings


2008
8th June
-
 Looking east from Midford Road at the first two arches of Midford Viaduct. © Ian Tiley
 -
 At the southern end looking north across the viaduct. © Ian Tiley
 -
-
 A plaque located midway along the western side of the viaduct. © Ian Tiley
 -
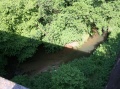 Looking down on Cam Brook from the eastern side of the viaduct. © Ian Tiley
 -
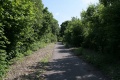
 Looking down from the western side part of the Cam Brook Bridge which carried the Camerton Branch underneath this viaduct can be seen. © Ian Tiley
 -
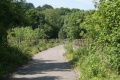
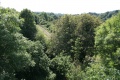 Looking west from the viaduct. © Ian Tiley


