This Way to the Forums! Join in and Post :)
And an Archive of the earlier Forum! This one is read only but brilliant stuff!
Category:Clive Moore
Jump to navigation
Jump to search
Photos taken by Clive Moore at the Bristol Railway Archive.
Pages in category "Clive Moore"
The following 29 pages are in this category, out of 29 total.
Media in category "Clive Moore"
The following 92 files are in this category, out of 92 total.
-
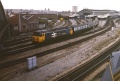 50003-1.jpg 1,006 × 680; 186 KB
-
 Albert Crescent1.jpg 1,024 × 699; 236 KB
-
 Albert Road2.jpg 1,024 × 686; 148 KB
-
 Avon Street1.jpg 911 × 628; 88 KB
-
 Avon Street19.jpg 790 × 549; 81 KB
-
 Avon Street2.jpg 909 × 619; 119 KB
-
 Avon Street20.jpg 1,000 × 662; 160 KB
-
 Avon Street21.jpg 997 × 669; 107 KB
-
 Avon Street22.jpg 1,008 × 677; 150 KB
-
 Avon Street3.jpg 914 × 624; 121 KB
-
 Avon Street4.jpg 908 × 623; 111 KB
-
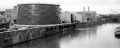 Avon Street5.jpg 914 × 363; 65 KB
-
 Barton Road7.jpg 830 × 556; 89 KB
-
 Bath Road Depot11.jpg 502 × 768; 69 KB
-
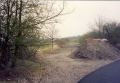 Brandy Bottom Colliery1.jpg 1,024 × 705; 244 KB
-
 Brandy Bottom Colliery2.jpg 1,024 × 674; 131 KB
-
 Brandy Bottom Colliery3.jpg 1,024 × 704; 253 KB
-
 Bridge Road 2-1.jpg 576 × 768; 166 KB
-
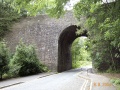 Bridge Road 2-2.jpg 1,024 × 768; 340 KB
-
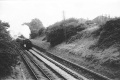 Charnhill Bridge1.jpg 830 × 556; 121 KB
-
 Charnhill Bridge2.jpg 932 × 611; 91 KB
-
 Charnhill Bridge3.jpg 1,024 × 768; 357 KB
-
 Charnhill Bridge4.jpg 1,024 × 768; 357 KB
-
 Charnhill Bridge5.jpg 1,024 × 768; 410 KB
-
 Charnhill Bridge6.jpg 1,024 × 768; 440 KB
-
 Charnhill Bridge7.jpg 1,024 × 768; 416 KB
-
 Charnhill Bridge8.jpg 1,024 × 768; 313 KB
-
 Coleroad1.jpg 1,024 × 702; 339 KB
-
 Coxgrove Hill1.jpg 1,146 × 783; 176 KB
-
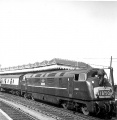 D860-1.jpg 750 × 768; 213 KB
-
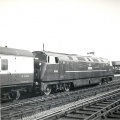 D860-2.jpg 767 × 768; 238 KB
-
 Feeder Road1.jpg 894 × 594; 85 KB
-
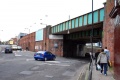 Fisherton Street1.jpg 1,000 × 667; 130 KB
-
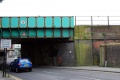 Fisherton Street2.jpg 1,000 × 667; 119 KB
-
 Mangotsfield1.jpg 1,024 × 696; 101 KB
-
 Mangotsfield2.jpg 1,024 × 676; 86 KB
-
 Mangotsfield3.jpg 915 × 598; 58 KB
-
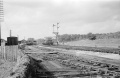 Mangotsfield4.jpg 941 × 611; 121 KB
-
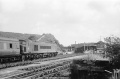 Mangotsfield5.jpg 1,024 × 678; 123 KB
-
 Mangotsfield6.jpg 1,064 × 684; 151 KB
-
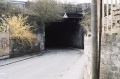 Queen Ann Road1.jpg 1,024 × 670; 229 KB
-
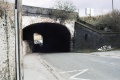 Queen Ann Road2.jpg 1,024 × 686; 201 KB
-
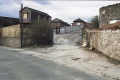 Queen Ann Road3.jpg 1,024 × 686; 219 KB
-
 Rodway Hill1.jpg 767 × 427; 57 KB
-
 Rodway Hill2.jpg 794 × 500; 56 KB
-
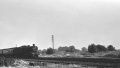 Rodway Hill3.jpg 761 × 432; 58 KB
-
 Rodway Hill4.jpg 763 × 446; 77 KB
-
 Salisbury1.jpg 1,000 × 667; 131 KB
-
 Salisbury10.jpg 1,000 × 667; 111 KB
-
 Salisbury11.jpg 1,000 × 670; 182 KB
-
 Salisbury12.jpg 1,000 × 670; 180 KB
-
 Salisbury13.jpg 1,000 × 670; 172 KB
-
 Salisbury14.jpg 1,000 × 670; 161 KB
-
 Salisbury15.jpg 1,000 × 670; 119 KB
-
 Salisbury16.jpg 1,000 × 667; 125 KB
-
 Salisbury17.jpg 1,000 × 670; 153 KB
-
 Salisbury18.jpg 1,000 × 670; 161 KB
-
 Salisbury2.jpg 1,000 × 667; 131 KB
-
 Salisbury3.jpg 1,000 × 667; 135 KB
-
 Salisbury4.jpg 1,000 × 670; 136 KB
-
 Salisbury5.jpg 1,000 × 670; 164 KB
-
 Salisbury6.jpg 1,000 × 670; 122 KB
-
 Salisbury7.jpg 1,000 × 670; 114 KB
-
 Salisbury8.jpg 1,000 × 667; 107 KB
-
 Salisbury9.jpg 1,000 × 670; 170 KB
-
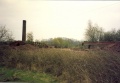 Shortwood Brickworks1.jpg 1,024 × 706; 163 KB
-
 Shortwood Brickworks2.jpg 1,024 × 708; 185 KB
-
 Shortwood Brickworks3.jpg 958 × 768; 252 KB
-
 Shortwood1.jpg 1,024 × 707; 149 KB
-
 Shortwood2.jpg 1,024 × 704; 124 KB
-
 Shortwood3.jpg 1,024 × 706; 194 KB
-
 Shortwood4.jpg 512 × 756; 100 KB
-
 Shortwood5.jpg 1,024 × 708; 172 KB
-
 Siston Common1.jpg 640 × 480; 82 KB
-
 Siston Common2.jpg 606 × 428; 62 KB
-
 Siston Hill1.jpg 1,024 × 713; 579 KB
-
 Siston Hill2.jpg 1,024 × 708; 510 KB
-
 Staple Hill Tunnel1.jpg 1,024 × 768; 409 KB
-
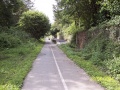 Staple Hill1.jpg 1,024 × 768; 358 KB
-
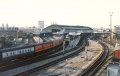 Temple Meads27.jpg 1,024 × 651; 136 KB
-
 Temple Meads28.jpg 1,024 × 686; 174 KB
-
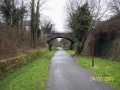 Tewell Hill1.jpg 1,024 × 768; 386 KB
-
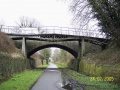 Tewell Hill2.jpg 1,024 × 768; 320 KB
-
 Tewell Hill3.jpg 480 × 360; 66 KB
-
 Tewell Hill4.jpg 480 × 360; 63 KB
-
 Tewell Hill5.jpg 480 × 360; 81 KB
-
 Victoria Street Bridge1.jpg 1,024 × 667; 231 KB
-
 Victoria Street Bridge2.jpg 1,024 × 650; 256 KB
-
 Warmley station1.jpg 1,024 × 708; 149 KB
-
 WSM7.jpg 613 × 627; 175 KB
-
 Yate South Junction1.jpg 523 × 789; 84 KB
-
 Yate South Junction2.jpg 525 × 787; 78 KB


